In this tutorial, we will be going over what spawn points are and how to use them for traveling.
With spawn points, you’ll be able to set where players load into an area as well as set points that can be used to warp players to certain places within an area or to entirely different areas.
What Is a Spawn Point?
A spawn point is the place within a map where players will load into upon entering an area. From the Map Editor, you can edit where the spawn point is set and even add additional spawn points that can be used for warping players to other locations around a map.
What Is Travel and How to Use It
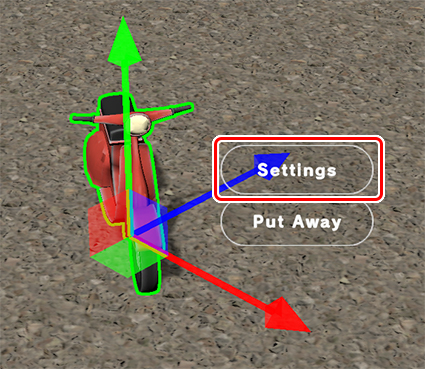
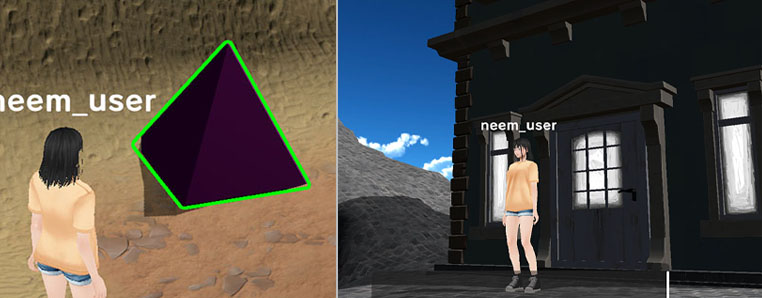
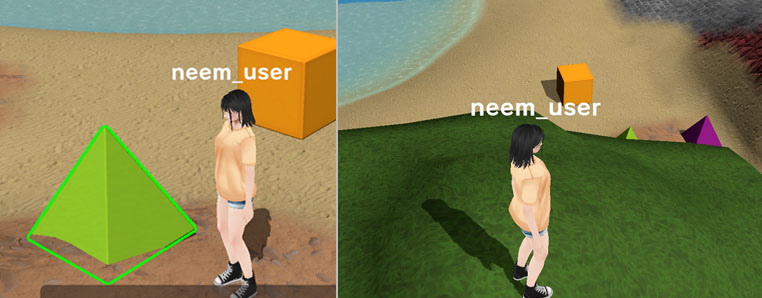
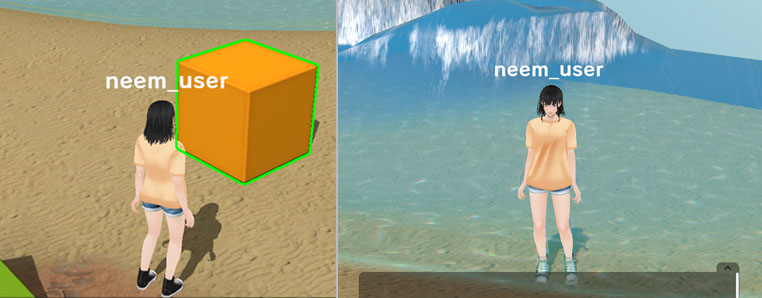
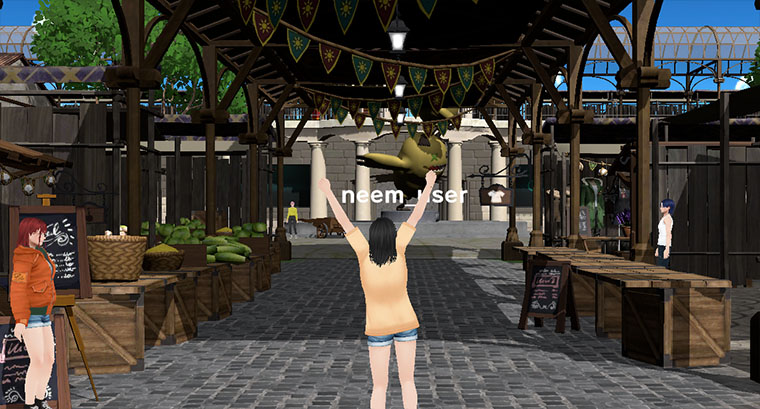
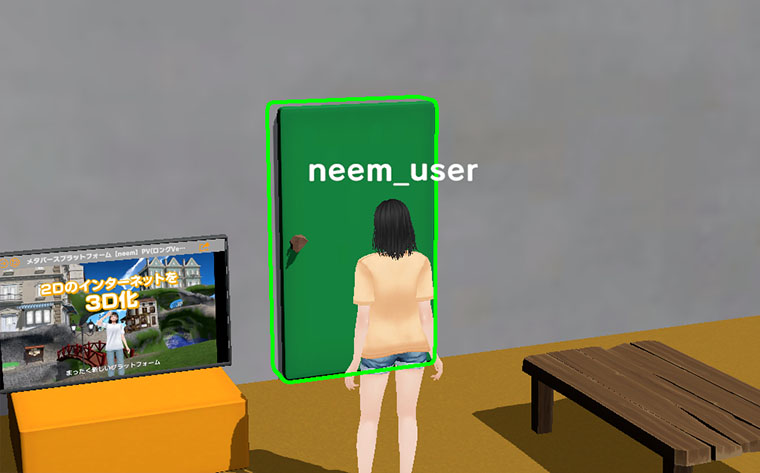
Objects that have been placed around a map can be set up to use the Travel feature. Whenever you click on an object with this feature set, you will be warped to the location set as its destination.
Objects that can be clicked will become highlighted in green when you hover over them with your cursor.
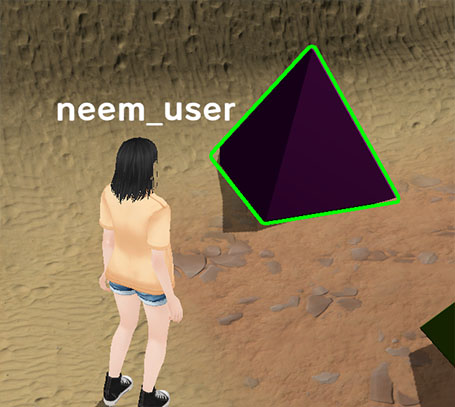
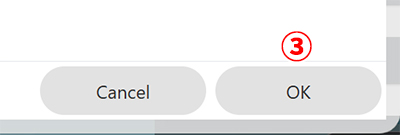
Once the object has been clicked, a dialog will appear.
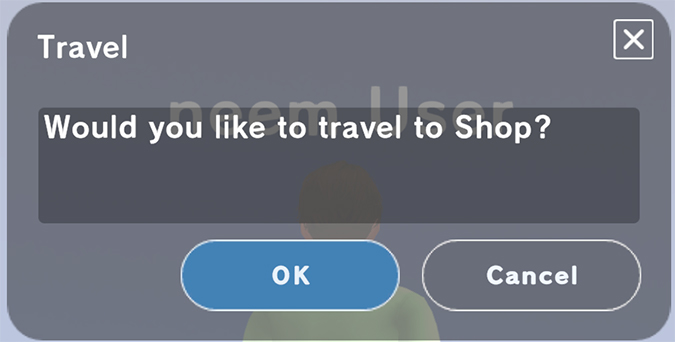
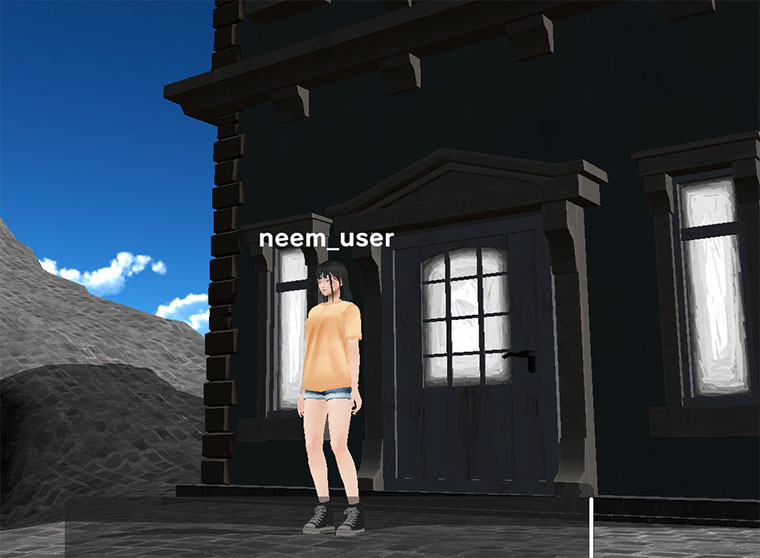
After clicking OK, you will be warped to the location that was set to the object!
Editing Spawn Points
In this section, we go over the basics of editing a spawn point.
How to Edit a Spawn Point
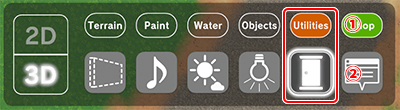
With the Map Editor open, select Functions > Spawn Points (door icon) from the tool bar at the bottom of the screen.
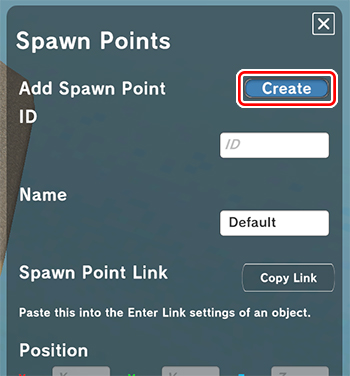
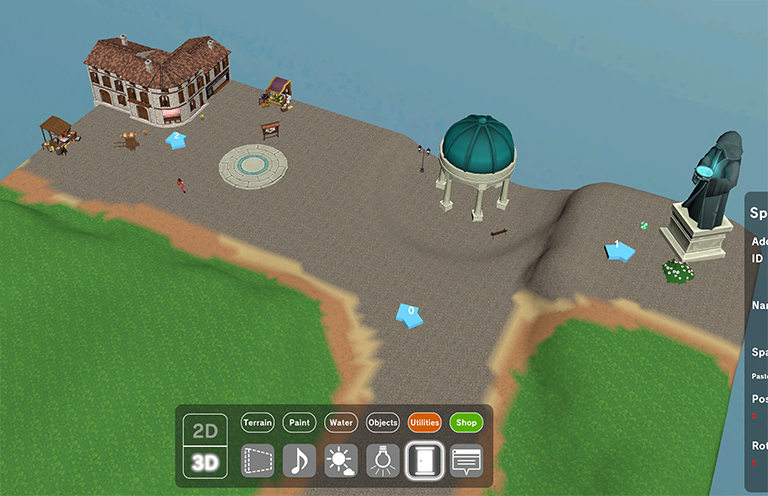
After selecting Spawn Points, an arrow will appear on your map.
Moving a Spawn Point
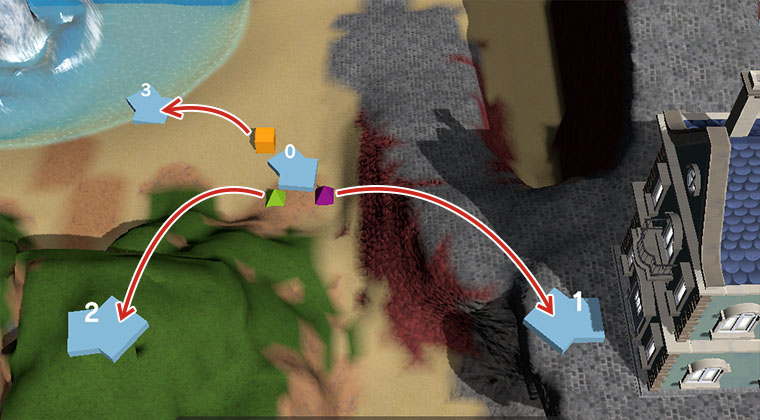
The arrow that appeared on your map labeled 0 is the spawn point where players will spawn when entering your area. This spawn point is set to the center of the map when an area is first created.
By clicking on the arrow, the transform gizmo will appear. You can use this to edit the translation and rotation of the spawn point.
Try finding the best place to set your spawn point such as placing it where players can have a nice complete view of your map, or at the start of a maze!
Spawn point 0 is also the point users will warp to when they click the Respawn button in the account menu.
(You can read more about the Respawn button in this tutorial.)
How to Set Up Travel Points
Adding a Spawn Point
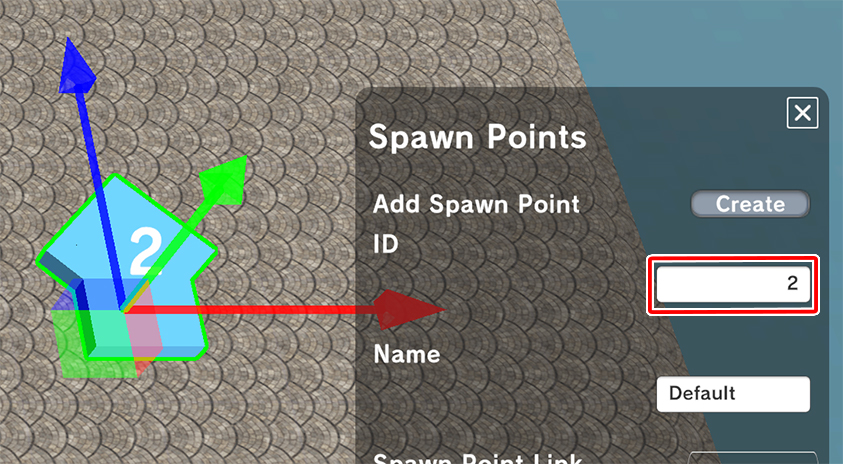
Additional spawn points can be added to a map. By simply adding additional spawn points, nothing in particular will happen. However, these spawn points can be set as travel point destinations just like how spawn point 0 works.
When you click on a spawn point arrow, the settings menu for that spawn point will display at the bottom right of the screen. By clicking on the Create button next to Add Spawn Point, a new spawn point will be added to your area.
The way in which spawn points are created is a bit different from adding objects to an area, but they can be set in fundamentally the same way.
Adding an Object to Be Used as a Travel Point
We will now be using the Travel Point feature to set up a warp point.
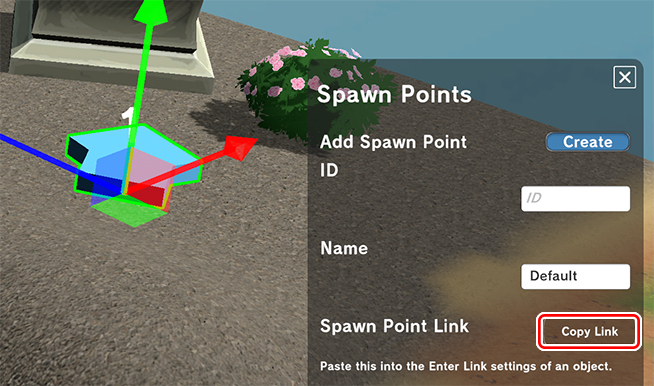
In order to set up an object to link to a spawn point, we will need the URL of the spawn point. Click on a spawn point arrow you’d like set as the destination for the travel point to bring up the spawn point Settings menu. From the Settings menu, click the Copy Link button next to Spawn Point Link to copy the link for the spawn point.
Next, we will link an object to the spawn point!
Setting Up an Object to Be a Travel Point
Select the object you would like to set as the warp point. Then, open its Settings menu.
Note: You will not be able to click on an object if you have the Functions tool selected. If you cannot select objects, try switching to the Objects tool.
With the object’s Settings menu open, let’s set it up to be a travel point.
Let’s begin by setting up the Function setting.
Note: Depending on the selected function, the related options/content displayed in the Settings menu may vary.
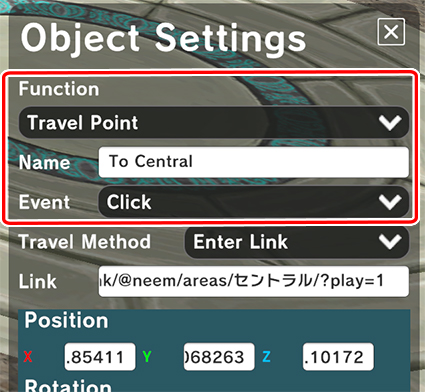
- Function
Select Travel Point. - Event
Select Click.
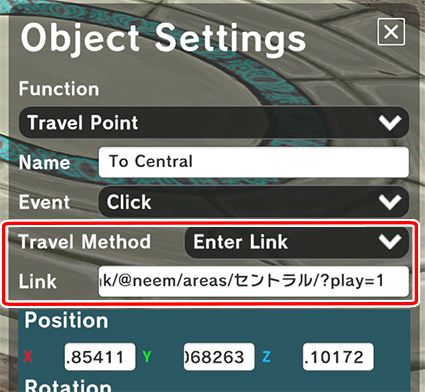
By setting this, when clicking on the object within your area, the function set to it will be called. - Travel Method
Select Enter Link.
The Enter Link method is an easy and flexible method to use if you know the URL for the destination you’d like to set.
We will cover the other warp methods available in another section.
- Link
Paste the link you copied using Copy Link here.
Once set, we have completed setting up our object as a travel point.
Save Your Area
And with this, we are finished with the setup. Let’s save everything and enter the area!
Using the Areas List Travel Method
The Areas List travel method lets you chose a destination from a list of other areas you’ve created or areas listed in your Favorites list so you can set a destination without needed to know its URL.
You can read how to get to this setting here.
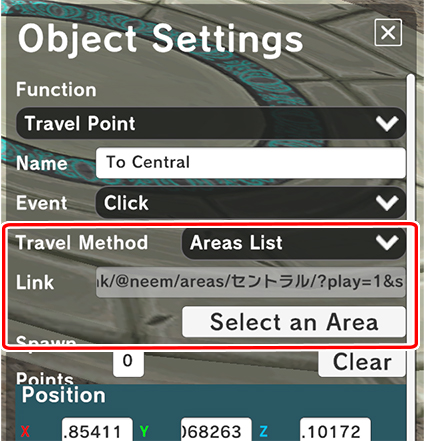
Select from List Options
- Select Area
Clicking Select an Area displays a list of areas you’ve created and areas marked as favorite. You can select which area to link to from these lists.
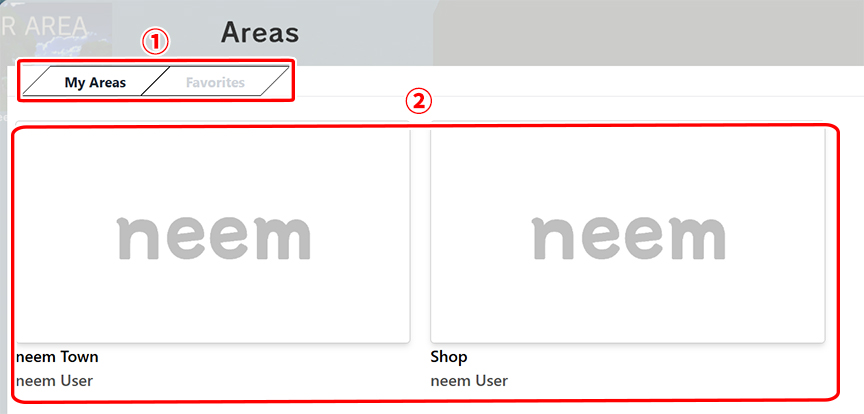
- Switches which list is displayed.
- Areas that can be selected to link to.
- Finishes setting which area is set to be warped to.
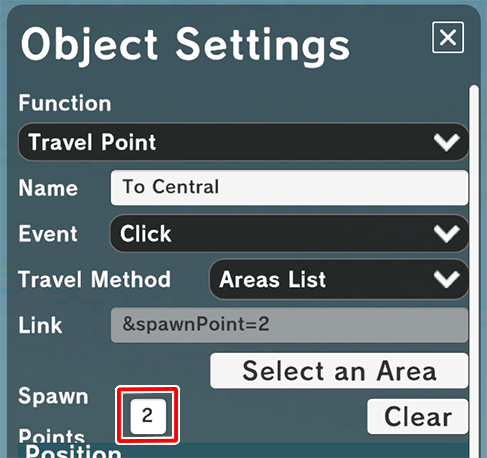
- Spawn Point
Enter the ID of a spawn point.
All areas have at least a spawn point with an ID of 0. If you do not know the ID of the spawn point you’d like to set, enter 0 here. - Clear
Removes what was set for Select Area and Spawn Point.
With this, our object is now set to be a travel point using the Areas List method.
Note: If you looking for the IDs of spawn points in an area you’ve made, you can find them by opening the different spawn point menus.
Various Ways to Use Travel Points
Placing Multiple Travel Objects in an Area
It’s possible to place multiple objects with the Travel Points feature set to them in the same area.
Warping to all sorts of places is possible!
Traveling to Other Areas
Using the Link travel method, it is possible to set the link to the URL of another area. When setting up a travel point, if the Link setting is set to another area’s URL, players will be warped to that area.
Note: Setting this will warp users to the spawn point with the ID of 0.
Using Spawn Points From Other Areas
When setting up objects to warp to other areas, you cannot set which spawn point users will warp to. However, using the URLs of spawn points within other areas you’ve made, you can warp users to certain points within that map.
By creating indoor and outdoor areas, you can link them to one another. You could even make puzzle games like escape rooms!
Creating Various Layouts
The Travel feature can be set on nearly all objects. Take advantage of this to set up various entrance points that best fit the atmosphere of your area!
In this tutorial, we went over spawn points and how to use them with the Travel feature. Expand your 3D space by linking areas you’ve created together or by linking to friends’ areas. Enjoy making use of this feature when creating areas!