In this tutorial, we go over how to add Virtual Screens to an area. By placing a Virtual Screen in an area, you will be able to browse the web from within your 3D area. You’ll be able to play videos like digital screens and billboards in a big city and even use them to promote your own website.
To learn how to use Virtual Screens and their features and restrictions, check out this tutorial.
Note: Object names are currently only displayed in Japanese. The Japanese name for this object is webブラウザ.
Before Using Virtual Screens
In order to ensure a comfortable experience for everyone, we ask that Virtual Screens not be used in a way that may cause harm or discomfort to others.
Obtaining a Virtual Screen Object
In order to browse the web in neem, you will need to obtain the object that is provided for this purpose. From the shop, let’s purchase a Virtual Screen object.
Area Editor
Adding a Virtual Screen to an Area
First, let’s start by opening the Map Editor for an area you’d like to add the Virtual Screen to. Next, we’ll add the Virtual Screen object to the area.
Placing the Virtual Screen on the map is the same as with any object, such as the Live Screen.
Refer to this tutorial on how to place objects and open up the Object Settings window.
Setting Up the Virtual Screen
Let’s change the settings of the Virtual Screen so that it displays a website. Start by opening up the Virtual Screen’s settings.
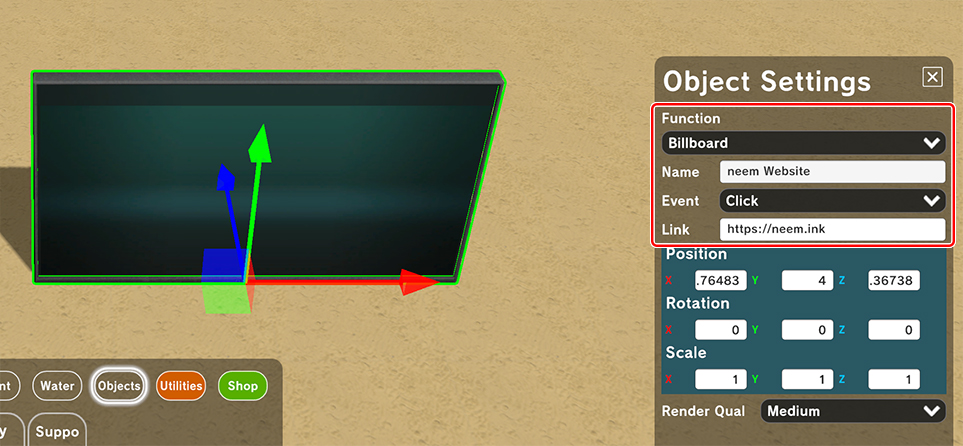
We will begin setting up the object by clicking on the Function dropdown menu.
Note: Depending on the selected function, the related options/content displayed in the Settings menu may vary.
- Function
Select Billboard. - Name
Enter a name. - Event Trigger
Depending on the event chosen, the way in which the content set to the Virtual Screen displays will changes.- None
The content set to the object will display automatically. - Click
When clicking the Virtual Screen, the content set to it will display.
- None
- Link
Enter the URL for a website you’d like to display.
Save Your Area
And with this, we are finished with the setting up the object. Let’s now save the changes that were made and enter the area!
Checking That the Virtual Screen Works
Now that we have finished setting up the Virtual Screen and entered the area, let’s make sure everything is working.
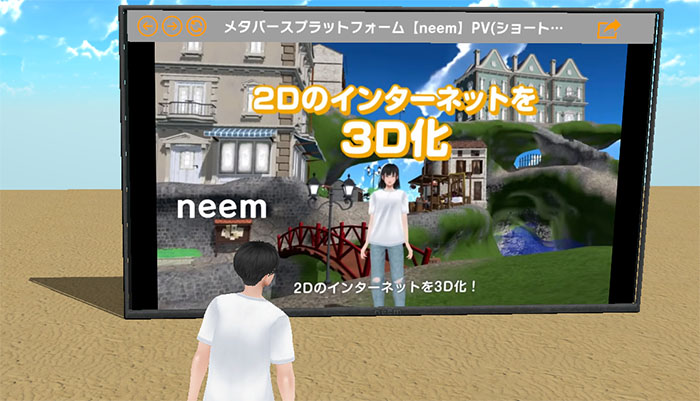
If everything is set up correctly, the web page you set to the Virtual Screen should be displaying! If you are far from the Virtual Screen or if the Virtual Screen’s Event Trigger is set to Click, try moving closer or clicking on the object to check and see if things are working as intended.
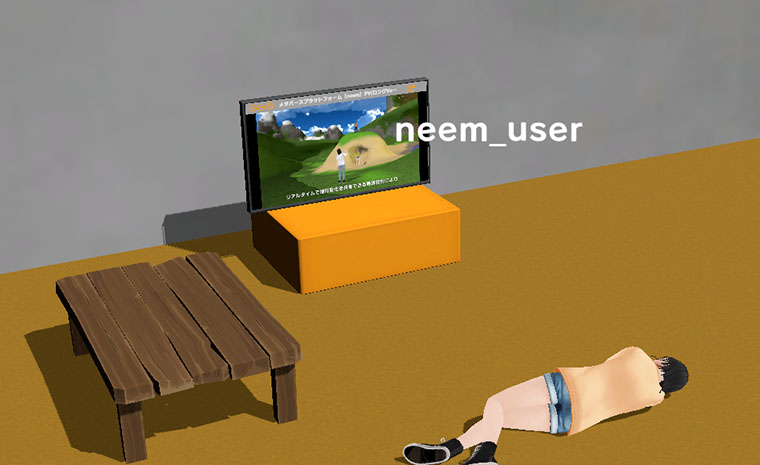
Various Ways to Place Virtual Screens
Like with Live Screens, Virtual Screens are also objects, so they can be placed around areas in various ways.
For more information on placing objects, refer to this tutorial.
Since Virtual Screens can be set to display the content set to them automatically, you could use them for things like advertising or decoration.

Ways to Utilize the Link Setting
Since the Virtual Screen is a simple web browser, you can use it for displaying and playing YouTube videos automatically.
For example, by settings the Link field to the following URL, you can have a video video play automatically in full screen.
https://www.youtube.com/embed/LDl4EX0cbCY?autoplay=1&mute=1
Note: LDl4EX0cbCY is the video ID of the above video.
You can set various parameters in a YouTube URL to change the video/video player’s settings, so try searching for keywords such as YouTube, URL, auto play, loop to learn more about the different parameters you can use.
In this tutorial, we briefly went over placing and setting up Virtual Screens. With this object, our vision for Web 3D using neem can now be integrated with the traditional web! Enjoy using this feature as a stepping stone towards a new web experience.