Welcome to neem! This tutorial will guide you through everything you need to know to get started using neem.
Looking to enter areas without an account? See this tutorial.
Note: Only registered neem users can create areas.
Registering an Account
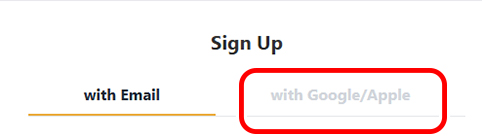
In order to get started creating areas in neem, you’ll need to sign up for an account. You can sign up for an account via email or by signing up using your Google or Apple account.
About Account Information
- Username
Usernames that are already in use cannot not be used.
Only letters (A-Z) and (a-z), numbers (0-9), underscores (_), hyphens (-) and periods (.) are allowed.
Note: This cannot be changed later. - Display Name
The name displayed to other users.
After signing up, you can change your display name on the Account Settings page at anytime. - Password
Passwords must be 8 characters or more.
They must also contain at least 1 uppercase and 1 lowercase letter.
Please read through our Terms of Service and Privacy Policy before signing up for an account.
Creating an Area
Creating areas is one of neem’s standout features. So, let’s get started creating one!
As of November 12, 2024, area creation is not available on the mobile version of the neem Browser. To create an area, please access the neem dashboard from a Windows PC.
Accessing the My Areas Page
From the neem dashboard, click My Areas at the top of the screen.

From the My Areas page, you’ll be able to create, edit and manage your areas!
Creating a New Area
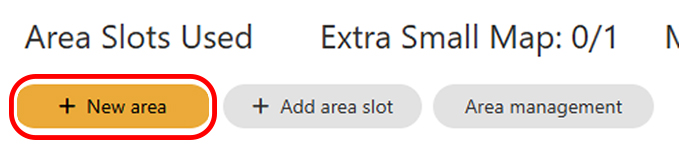
To begin creating a new area, click New Area.
Note: A total of 2 areas can be created for free.
Selecting a Map Size
First, you’ll need to select map size you’d like to use. The map sizes that are available for free are 1 Small Map and 1 Medium Map. Map Size refers to the size of the terrain within an area.
Note: Map sizes cannot be changed.
●About the Available Map Sizes
・Small Map: A fairly small area. Great for creating interiors or simple areas.
・Medium Map: A fairly spacious area. Best for creating something elaborate.
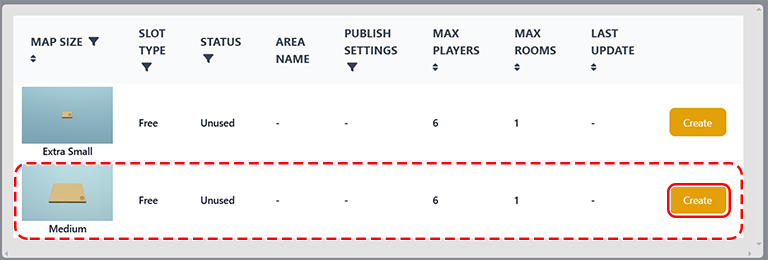
Once you’ve decided on a map size, click the Create button to the right of it.
Enter Area Information
Now, let’s set up the initial area settings.
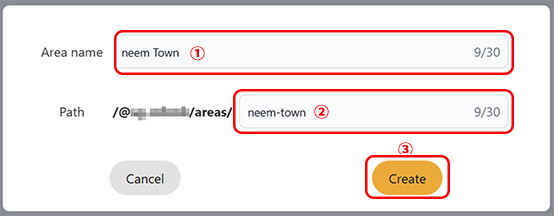
- Enter an area name.
Note: This can be changed later. - Enter a path for the area.
Note: This can be changed later.- This will be used in your area’s URL.
- Area URLs are as follows: neem.ink/@username/areas/path/
- Press Create to save the area information and create your new area!

And there you go! You’ve created your first area.
We won’t be covering how to edit your area in this tutorial, so if you want to jump right into editing, check out the tutorials listed here.
Entering an Area
Entering Your Newly Created Area
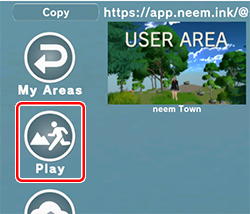
Now that your area has been created, let’s check it out! To enter, click Enter at the top of the left-side menu.
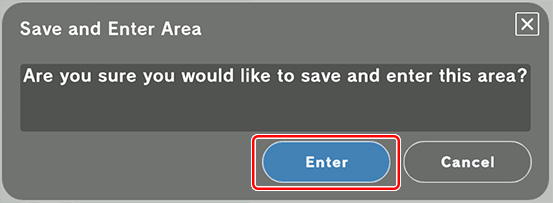
A dialog box will popup asking you if you would like to save and enter your area. Press Enter to enter it.
After pressing Enter, a dialog titled Open neem Browser? will appear. However, to enter areas we will need to install the neem Browser first.
Installing the neem Browser
Download the neem Browser Installer
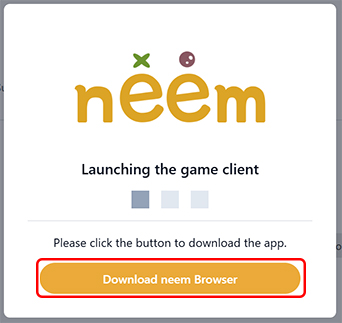
To enter areas, you will need the neem Browser app. Whenever Play is clicked on an area page, the following window will display. Once displayed, we will be able to download the installer. Click on the Download neem Browser button to download the installer.
Note: You will need to close the Open neem Browser? dialog to be able to click the button.
As of November 1st, 2024, a warning may appear on the Windows version of neem Browser. Please note that this warning appears on all apps downloaded from the internet and that there are no security issues with neem Browser. (For more details, click here.)
neem Browser Installation
Now that the installer has been downloaded, open it. Once opened, press Install to begin the installation.
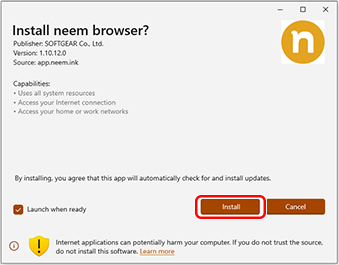
Once the installation finishes, the neem Browser will start up!
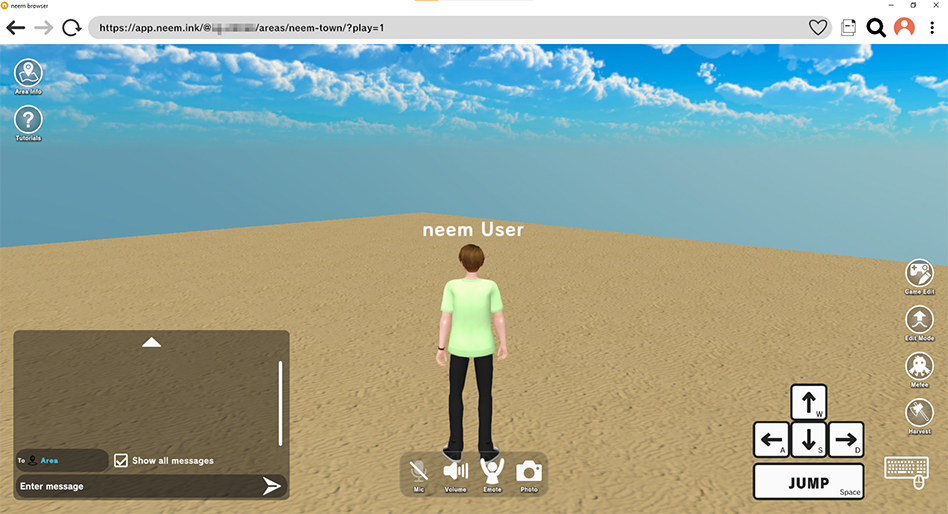
With this, you will have entered your area! Now, with the neem Browser installed, you’ll be able to enter areas upon pressing Play and Open neem Browser.
Here, we went over entering an area from the Map Editor. However, there are many other ways to enter areas.
Tip: Making an Area Public
When you first create an area, the area will be set so that other users cannot see or access it. Once you’re ready to share your creation, you can change the area’s settings to make it public!
For details on how to make an area public, check out this guide on publishing settings.
How to Enter an Area Using the Mobile Version of neem Browser
Note: The mobile version of neem Browser is currently only available in Japan.
With the mobile version of the neem Browser, you can access and enjoy vising areas in neem from smartphones or other mobile devices.
Once you’ve started up the app, you’ll need to sign in to your neem account. Once signing in, a list of all public areas will be displayed.
By scrolling through the list, you’ll find a section called My Areas. Here, you can find the areas you’ve created.
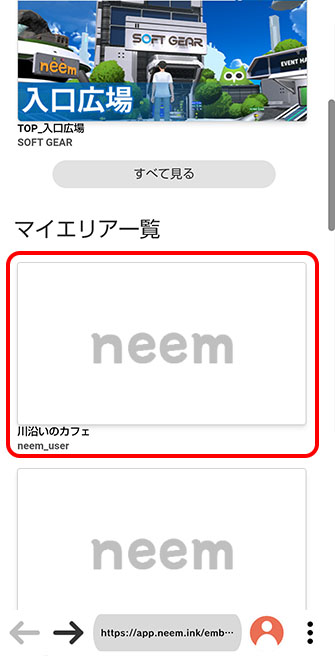
Select the area you’d like to visit to open its area details page.
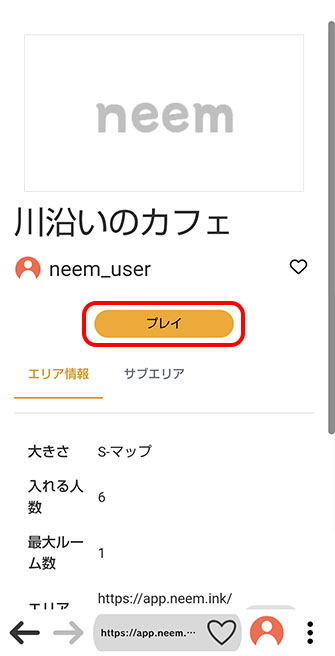
Press the Play button and to enter the area!

And with that, you’ve entered the area!
Now we’ve covered how to enter your area from the areas list, but there are still other ways to access areas as well.
Getting em Through Login Bonuses
em is a currency unique to neem. It can be used to buy area objects and clothing and items for avatars. Once a day, an em login bonus can be claimed.
You can claim your login bonus through your Inbox. You can access your inbox from either the neem dashboard or the neem Browser.
Accessing the Inbox in neem Browser
To the right of the address bar, click on your account icon to open your account menu. From there, select Inbox to open your inbox.
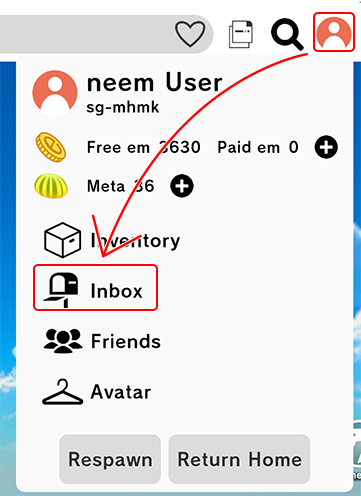
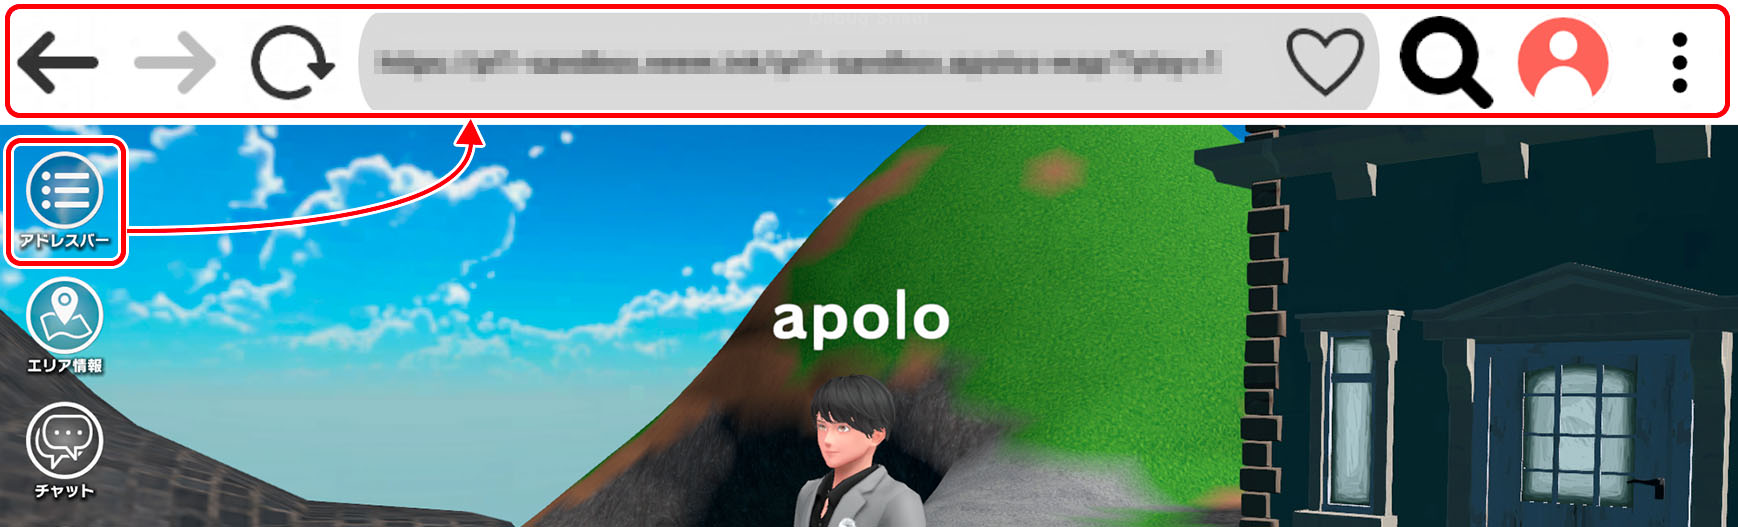
On the mobile version of neem Browser, the address bar is not shown by default. You will need to click on Address Bar at the top left of the screen to display it.
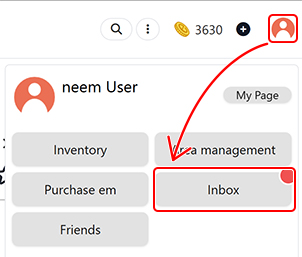
Accessing the Inbox From the neem Dashboard
Click on your account icon at the top right of the screen to open your account menu. From there, select Inbox to open your inbox.
Claiming Your Login Bonus
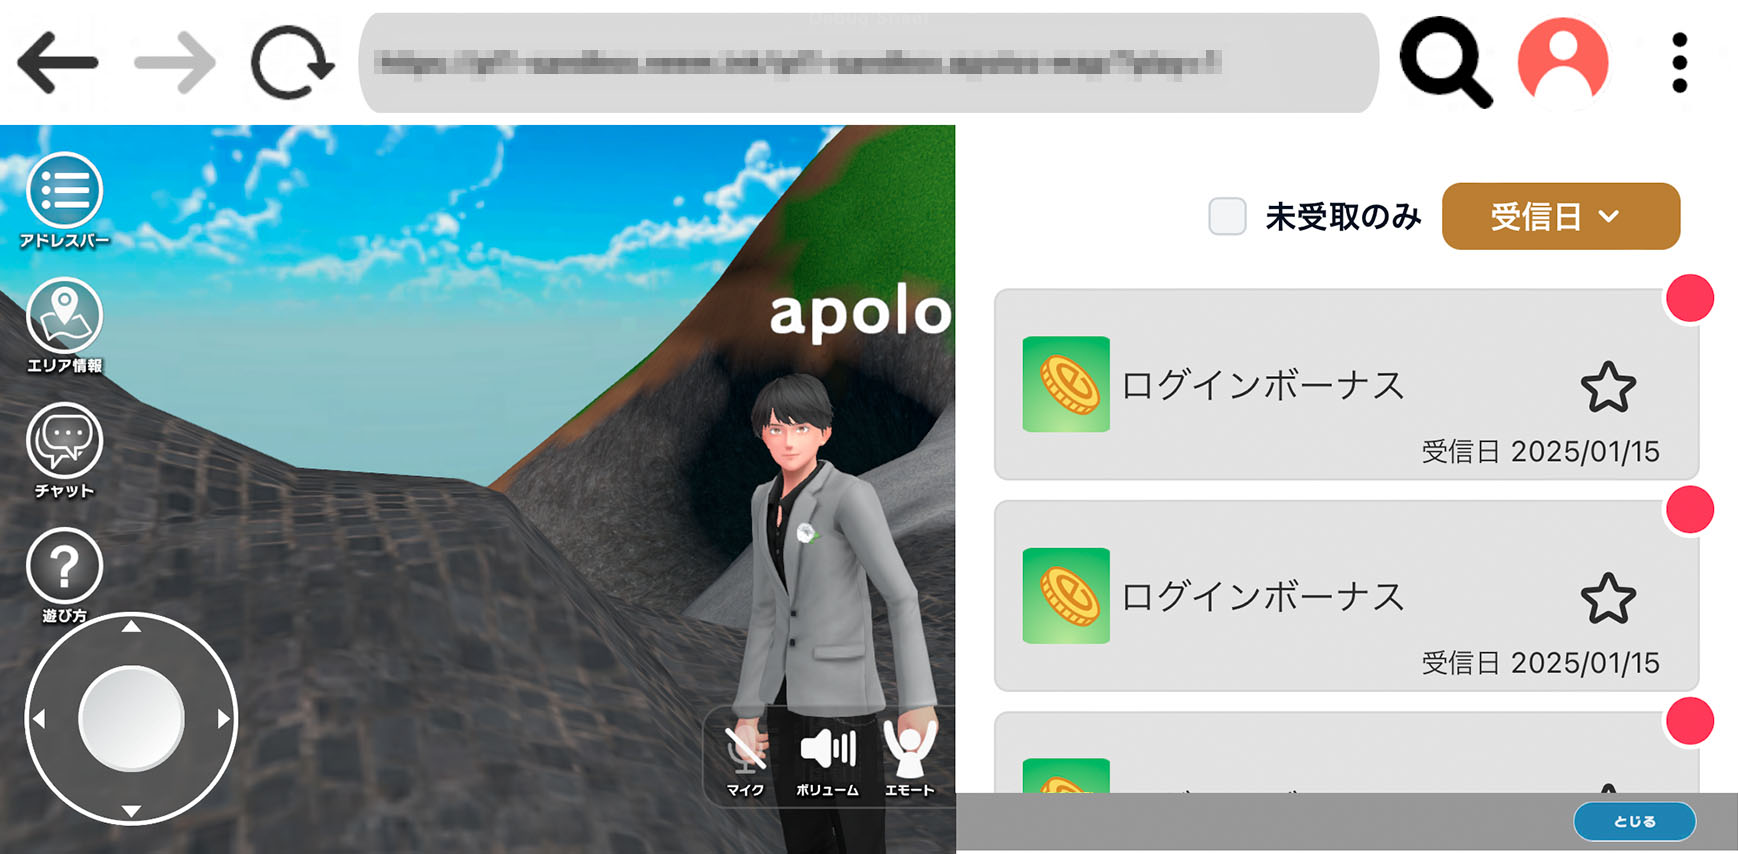
Once you’ve opened your inbox, it’s time to claim your login bonus! We’ll be going over how to do this using the neem dashboard.
Note: Inbox items currently only display in Japanese.

- Select a message from your message list. This will display the messages content.
- From the message content, click on Claim to get your login bonus!
- You can also claim all login bonuses without opening messages by clicking Claim All at the bottom of the messages list.
You can claim items just like you did in the dashboard.
You can now spend your free em at shops and more!
The following items can be purchased using em.
- Objects that can can be placed within areas
- Items for customizing avatars
Running out of objects to place in an area? Looking to customize your avatar further? Try spending em in the shop!
Register for a neem account by clicking here!
Let us know what you think by taking our survey.
Questions or concerns? Contact us here.