
In this tutorial, we go over how to add objects to an area and set them up for video chatting.
To learn how to video chat, check out this tutorial.
Map Editor
Placing Objects
Let’s begin by opening up the Map Editor for the area you’d like to be able to video chat in.
To be able to video chat in an area, an object that will serve as the mechanism for entering a chat room will need to be added to the map. First, let’s place an object on the map that we’d like to use as the entrance to the chat room.
Note: Inventory items are currently only displayed in Japanese.
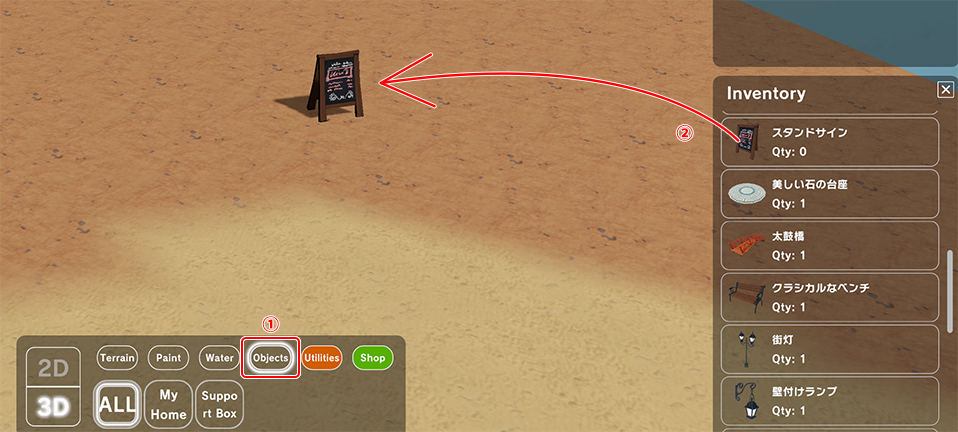
- Select Objects from the tools menu.
- The Inventory menu will open to the right.
From there, select the object you’d like to use. While selected, objects can be placed anywhere on a map by clicking somewhere on it.
Setting Up Objects for Video Chatting
Now, let’s make it so the object we’ve placed in the area will function as the entrance to the chat room.
Open the Object’s Settings
Clicking on the object you placed in the area will display a menu. Select Settings from the menu.
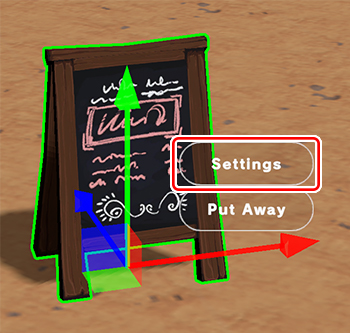
After clicking Settings, the Object Settings window will appear. From here, we’ll set up the chat room functionality!
Setting the Chat Room Function on an Object
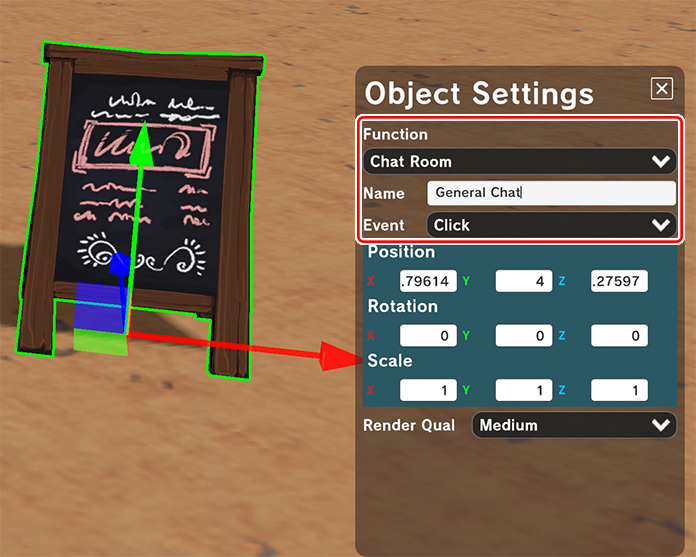
First, let’s start with the Function setting.
Note: The settings displayed may change depending on which function is set.
- Function
Select Chat Room from the dropdown menu. - Event
Select Click from the dropdown menu.
When the object is clicked the function set to it will be called. - Name
Enter the name you’d like to give the chat room.
We recommend naming the room something easy to understand. For example, the topic of discussion.
Save Your Area
And with that, set up has been completed! Save your changes and head on into the area.
Checking That the Video Chat Room Works
Now that we have entered the area, it’s time to make sure everything works.

If the object is set properly, you should be able to click it. Let’s click it and press OK to start or join the video chat room.
Learn more about entering chat rooms here.
That concludes this tutorial on how to add objects to an area to set up video chat rooms. You can make use of video chat for many things. For example, conducting live performances, seminars, meetings and more!