My Home is a new object that lets you easily warp to an area you made. Its truly a home away from home!
You can connect your areas to your My Home to show them off, or share your My Home with friends so you can visit each other’s areas!
What is My Home?
My Home is an object that links to one of your areas. Objects themselves have a linking function that can be set, but with My Home, linking to an area is easier than ever. To learn how to set up travel to other areas and locations using objects other than My Home, check out this tutorial.
Furthermore, My Home can be shared with friends! Like you’d expect with a social experience, you’ll be able to easily access a friend’s area, collaborate on making a 3D world, and make use of this feature in all sorts of different ways.
Friend’s My Home
Your friend’s (users who have followed you back) My Home, like with your own My Home, can be placed within an area you’ve made. (Learn about friends here.)
Setting Up Your My Home
Once you’ve set up your My Home, it can be used in the map editor! To set up your My Home, you will need to have created an area. (Learn about area creation here.)
Note: As of 11/12, My Home cannot be set up from the mobile version of neem Browser.
Accessing the My Home Page
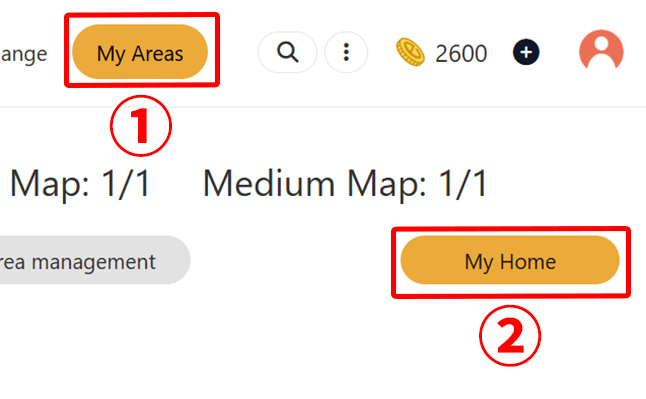
- Click on My Areas to open your My Areas page.
- Click on My Home to the right of the screen.
Now that the My Home page is open, let’s set it up.
My Home Settings
With the Settings tab selected, you can edit the general settings for your My Home.
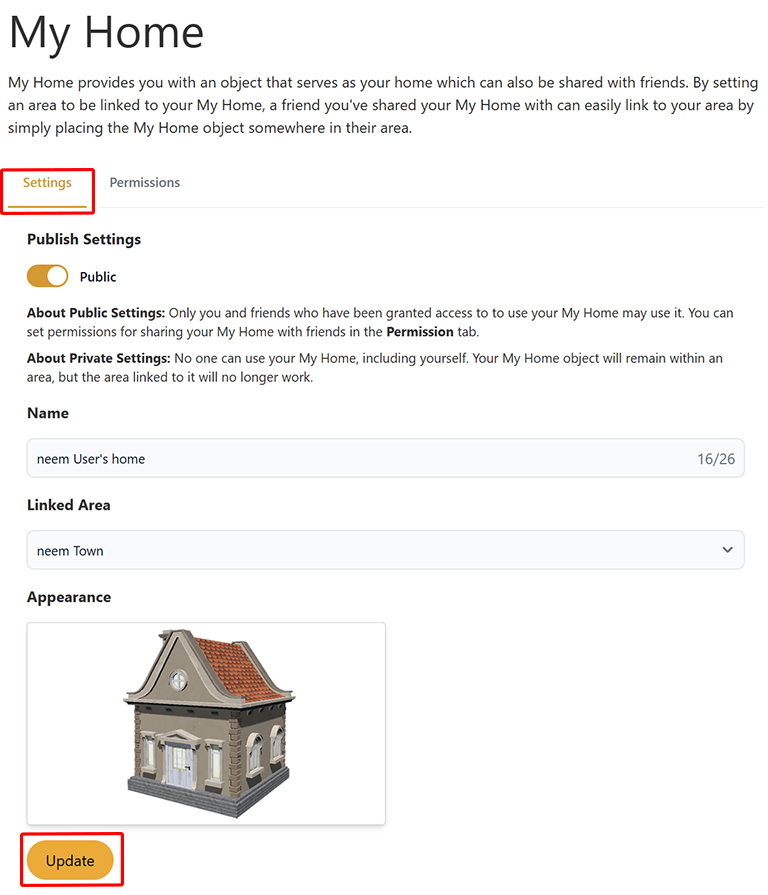
- Publish Settings
Changes the publish settings of your My Home. If your My Home is not set to Public, no one, including yourself, will not be able to make use of your My Home. - Name
Sets the name of your My Home. The name will be displayed above your My Home when placed in an area. - Linked Area
Sets the area you will be warped to when clicking on your My Home object.
Note: If an area is not set, no one, including yourself, will be able to make use of your My Home. When My Home will not work as intended:- When Not Set is seleted.
- When the area set has been set to private.
- When the area set has been deleted.
- Appearance
The appearance of your My Home.
Note: As of 11/12, the appearance of your My Home cannot be changed. We plan to change this in a future update.
Once you have finished settings up your My Home, click on Update to save the changes. Once saved, your My Home has been set up and is ready for use.
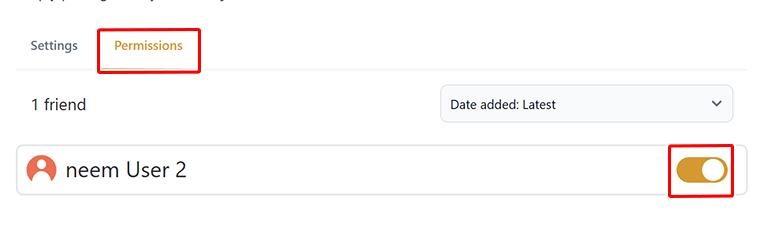
Permissions
Clicking on the Permissions tab will display your friends. Using the button to the right of a friend, you can set the permissions for using your My Home.
Placing Your My Home in an Area
It’s now time to place your My Home in an area! Learn how to use the Map Editor here.
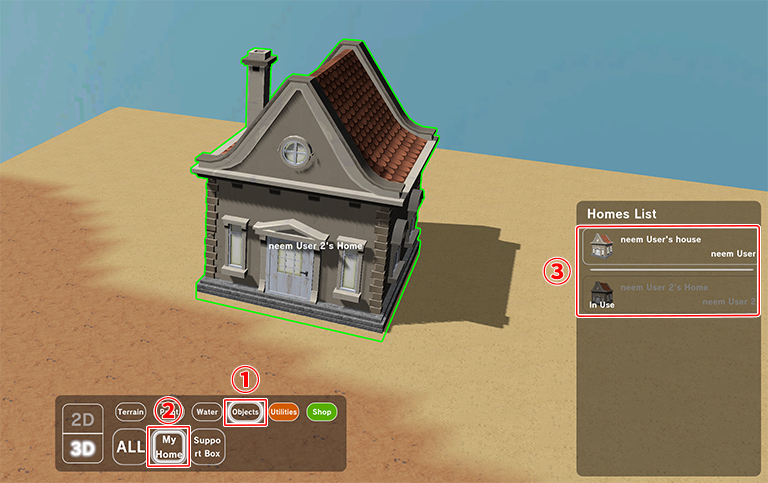
- Click on Objects.
- Select My Home.
- The My Home list will display your My Home as well as friend’s My Homes that you have permission to access.
Select a My Home you’d like to place in your area, and place it.
Note
・Even if you’ve befriended someone, depending on their publish settings, their My Home may not appear in the My Home list.
・Because the My Home is set up to warp you to areas, other functions cannot be set on it.
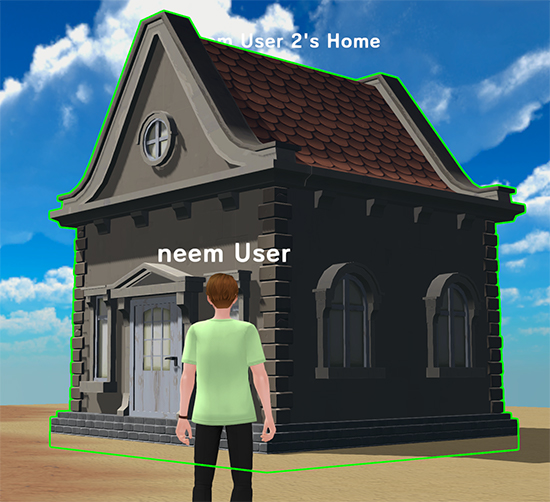
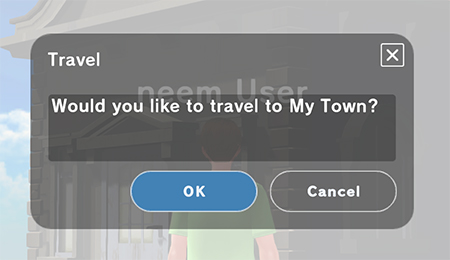
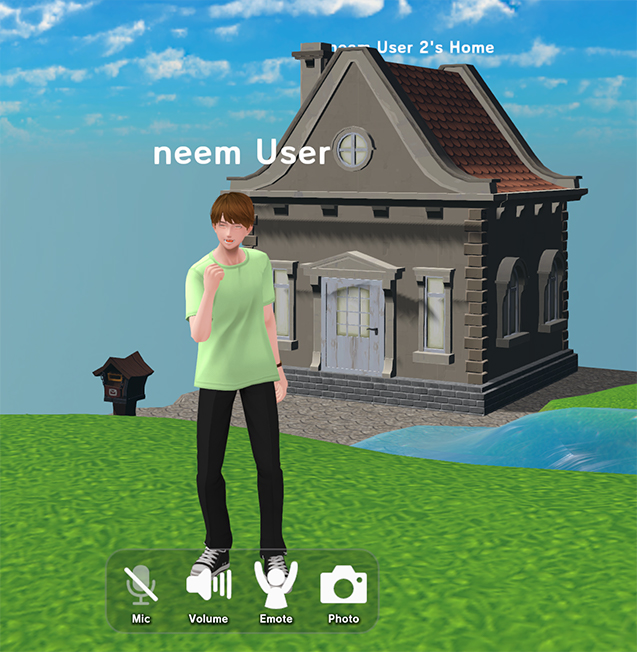
Warping to an Area Using My Home
With a My Home placed in your area, let’s now enter the area to try it out!
In this tutorial, we covered the My Home feature. In addition to updating what you can do with your My Home such as changing its appearance, we will be adding more features for communication purposes. We hope you look forward to what’s to come!