neem has many features that we haven’t fully covered yet! In this tutorial, we briefly go over some of those features.
Note: We plan to release other tutorials that go into more detail on each of the features covered in this tutorial.
How to Enter an Area
There are many different ways to enter an area, but here we’ll go over the main ways of doing so.
Home Page
By visiting the Home page, you will be able to view a list of all areas that have been publicly released.

- Official Areas
Official neem areas are displayed here. - Companies
Company areas are displayed here. - My Areas
Areas you have created are displayed here.
Note: This list only displays while you are signed in. - Favorites
Areas that you have favorited are displayed here.
Note: Favorites are only displayed while you are signed in. - New Areas
Displays areas that have recently been created. - All Areas
All areas, including official areas and areas created by other users are displayed here.
(Areas are list from newest to oldest.)
My Areas Page
By clicking My Areas in the header navigation, you will be taken to your My Areas page. Here, you can view the areas you have created.

Area Search
You can search for areas from the Area Search page by clicking the magnifying glass icon in the header.
You can learn more about searching for areas here.

Area URLs
neem areas all have their own unique URL. For example, by entering the URL of an area shared by someone on social media into a web browser, you will be able to directly enter that area.
How to Share Areas
There are many places within neem where you can copy an area’s URL to your clipboard.


Like explained above, if you share a URL you copied via social media, people who view your post will be able to enter the area you shared via that URL!
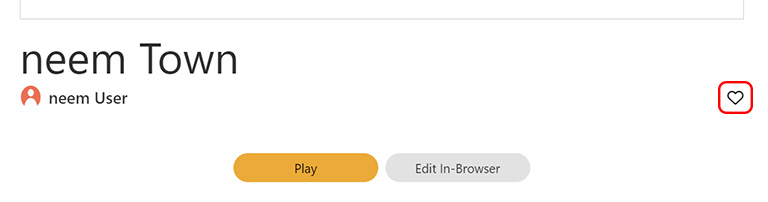
How to Favorite Areas
Whenever you open an area’s page or enter an area, you will be able to favorite that area. Areas that you have favorited will be displayed on the home page and within neem Browser.
By pressing the heart-shaped button, you will add the area to your favorites list.

How to Purchase Objects and Avatar Items From the Shop
You can use em to purchase objects to place around an area and items to customize your avatar. Be sure to collect your em login bonus from your inbox.
You can access the shop page by clicking the Shops button in the header navigation.

Editing User Profile, Account Settings and More
Here, we go over how to edit your profile, account settings and more.
Editing Your Profile From neem Browser
While visiting an area in neem Browser, you can update your profile by doing the following:
- You can edit your icon image, display name, and self-introduction using the PC version of neem Browser. To start editing, enter any area using neem Browser.
- You can edit your display name from the dashboard and mobile version of neem Browser. (You can learn more about this here.)
▼How to Edit Your Profile (PC Version of neem Browser)
Here, we go over how to edit your profile on the PC version of neem Browser.
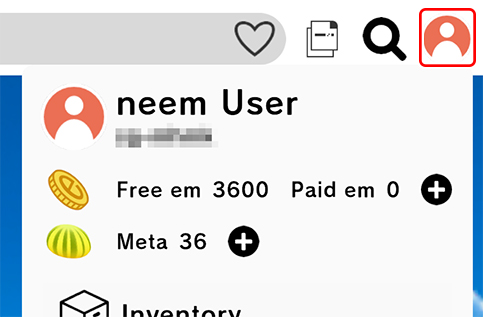
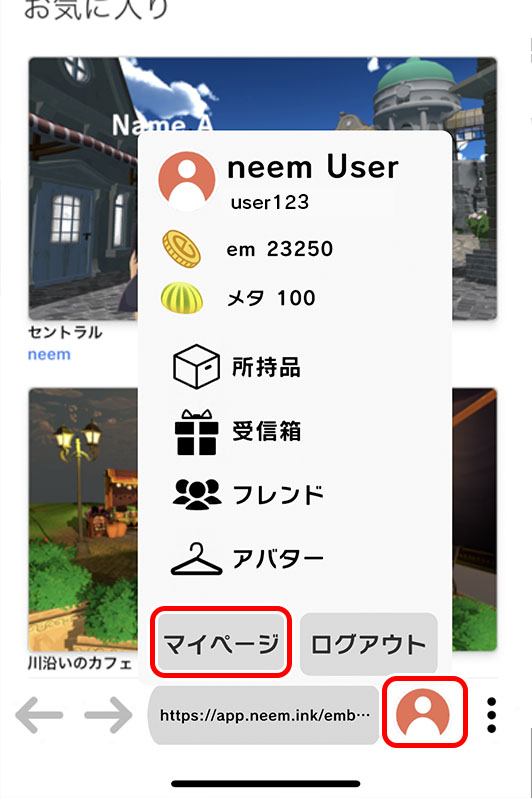
While visiting an area from neem Browser, click on your profile icon at the top right of the screen to open the Account Menu.
Now, with the Account Menu open, click on the profile icon once more.

Your profile will now be displayed. Click on the 3 dots and then click Edit.
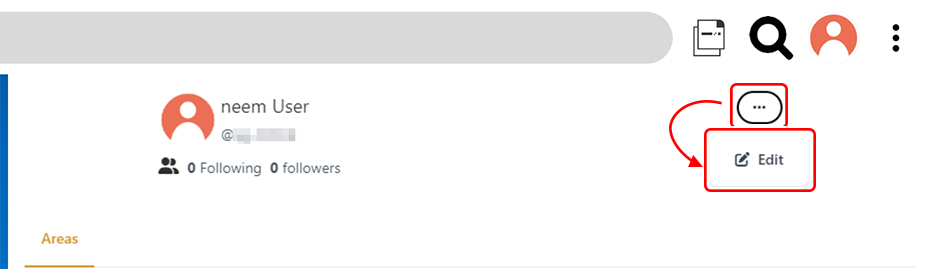
This opens the profile edit screen. From here, you can edit your icon, display name and bio.
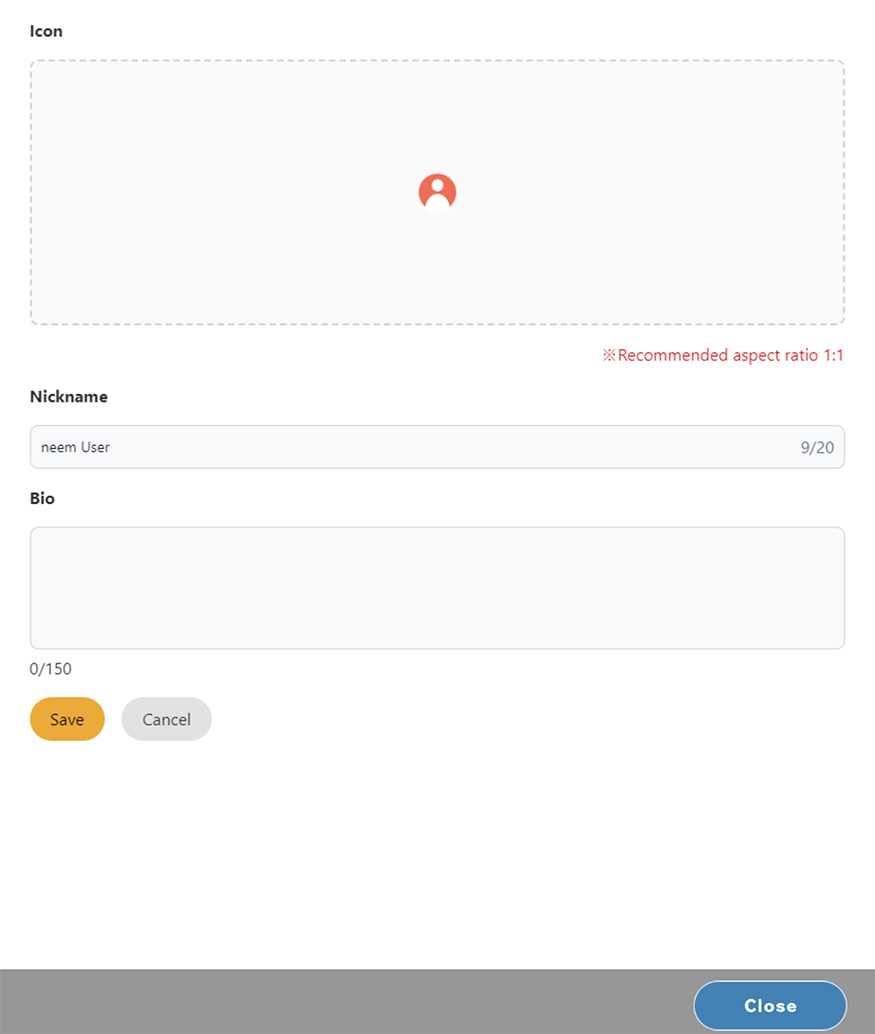
- Icon
By clicking on the area below the word icon, you will be able to select an image to be used as your icon from the device you are currently using. - Display Name
This is the name shown to other players who view your profile. This is also the name that appears above your avatar’s head. When you first create an account, your display name will be set as your username. - Self Introduction
Here, you can set a self introduction.
Once you’ve finished editing, click on Save to apply your changes.
My Page and Account Settings
Here we go over the My Page and Account Settings page.
Opening Your My Page on PC
With neem Browser open, click on your profile icon at the top right of the screen to open the menu.
Opening Your My Page on Mobile
With neem Browser open and the home menu loaded, click on your profile icon at the bottom right of the screen to open the menu.
Note: The mobile version of neem Browser is currently available only in Japan.
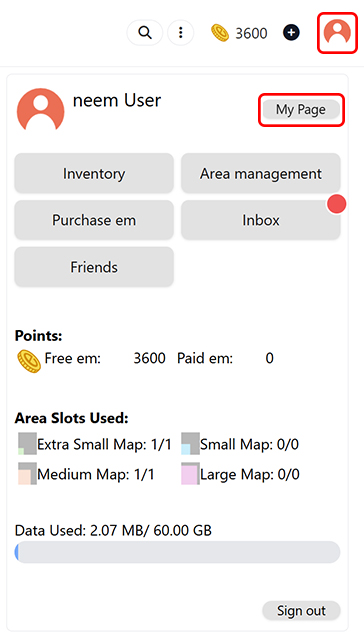
Regarding the buttons at the bottom of the menu
- My Page
This opens your My Page. - Logout
This logs you out of your account.
Opening the Account Settings From Your My Page
From the menu, select My Page to open your My Page.
Next, select Account Settings.
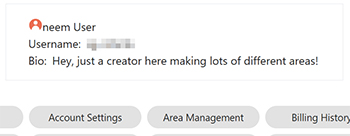
Account Settings Page
From the Account Settings page, you can view and edit account related settings such as your display name as well as delete your account.
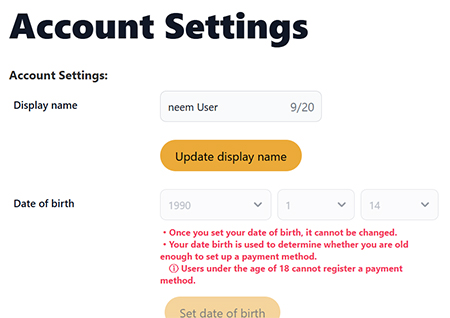
- Display Name
Here, you can enter a new display name and update it by pressing Update display name. - Date of Birth & Payment Method
Check out this tutorial for more information on these. - Newsletter
Sets whether newsletters are received or not. After ticking or unticking the checkbox next to Receive newsletters, press the Update settings button to save your changes. - Close Account
Closes the account that is currently logged in.
Note: Once an account is deleted, all of its data is deleted and cannot be restored.
Features Available While Visiting an Area
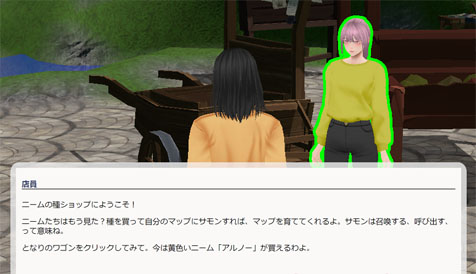
Clickable Objects
Objects placed around an area can be clicked. These objects become highlighted in green when you hover over them with your cursor. When you click on these objects, you will perform whatever function has been set to them. This could include traveling to other areas, entering shops and more.
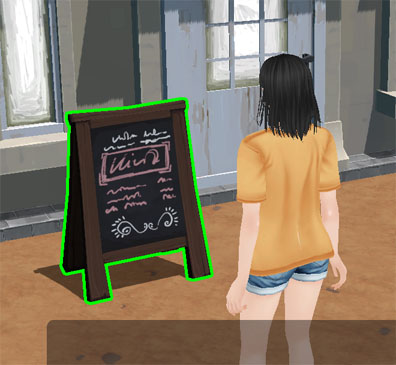
By the way, there are NPCs in the official areas which you can speak with.
Note: All text displayed in Central is currently only displayed in Japanese.
In future updates, this kind of functionality will be available for all neem users to make use of when creating areas!
Avatar Customization
Check out this tutorial for details.
Respawning
If you ever get stuck in the terrain, can’t get out of a river, or are unable to move your avatar, you can always return to the area’s starting point.
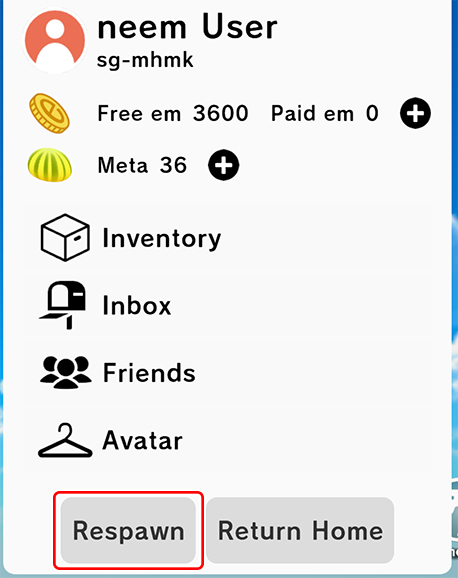
Click on your profile icon and select Respawn from the menu. Doing so will return you to the area starting point.
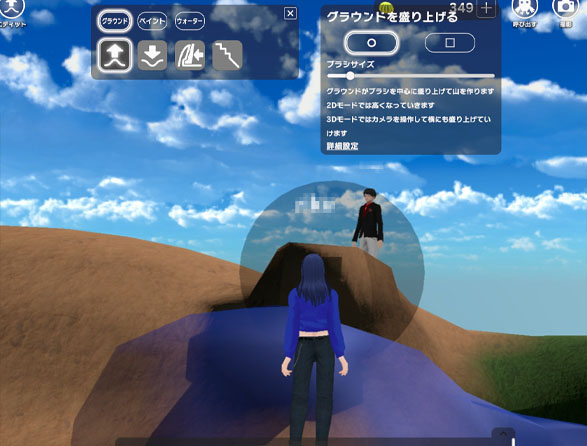
Edit Mode
Click on Edit to the right of the screen to enter Edit Mode. While in this mode, you can edit your area with others in the area. You can learn more about the Edit button here.
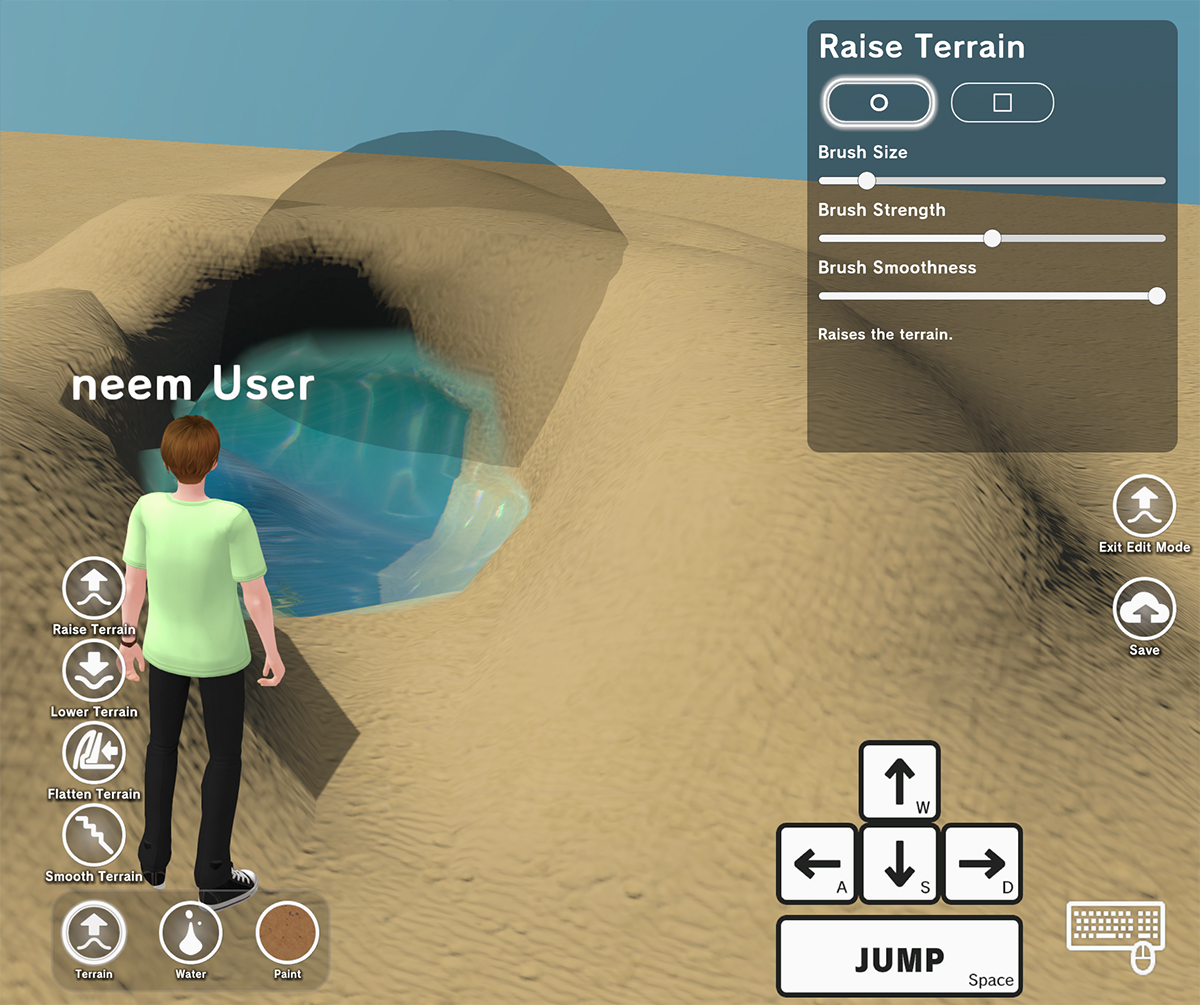
Notes on Edit Mode
Currently, edits made while in this mode can only be performed by the area owner. We are working to make it so other users in an area can edit as well.
Edits made will be done in real time!

You can use this as an opportunity to cause a little mischief. Maybe make someone fall into a pond! But be careful not to cause a fight.
Saving Changes Made While in Edit Mode
To save changes made, click on the Save button.
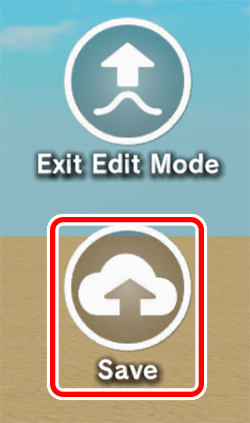
Note: If you do not click on Save before traveling to other areas or quitting neem Browser, your changes will not be saved.
That concludes the additional features available in neem. We plan to cover more features that weren’t introduce here later. Also, we plan to release more detailed explanations of these features in future tutorials.
We are continuing to improve neem itself, including making complicated features easier to understand.
Feel free to send us your opinions and impressions through our survey or contact form!
We hope you continue to enjoy neem!